Dynamic Mastering: Balancing Loudness and Dynamics in Your Tracks
Mastering a song is the final step before releasing the track to the world, and it can make or break the overall sound quality.
A common pitfall for producers is to over-compress and over-limit their master, squashing the dynamic range from their mix. It's a rookie mistake and significantly decreases the sonic quality of your sound.
In this article, we will explore the problem of over-compression, the basics of dynamic range, techniques for dynamic mastering, balancing levels with automation, and the importance of monitoring.
The Problem of Over-Compression: Why Dynamic Mastering is Essential
Over-compression is a common problem in music production that can result in a loss of dynamics, a lack of clarity, and a loss of emotional impact in the music.
This happens when the dynamic range of a track is compressed too much, causing the loud parts to become quieter and the quiet parts to become louder.
This can lead to a flat and lifeless sound, with no variation or excitement.
Dynamic mastering is essential because it helps to balance the levels of a track and bring out the natural dynamics of the music.
It ensures that the loud parts are not too loud and the quiet parts are not too quiet.
This creates a more natural and dynamic sound that is pleasing to the ear and more emotionally engaging for the listener.
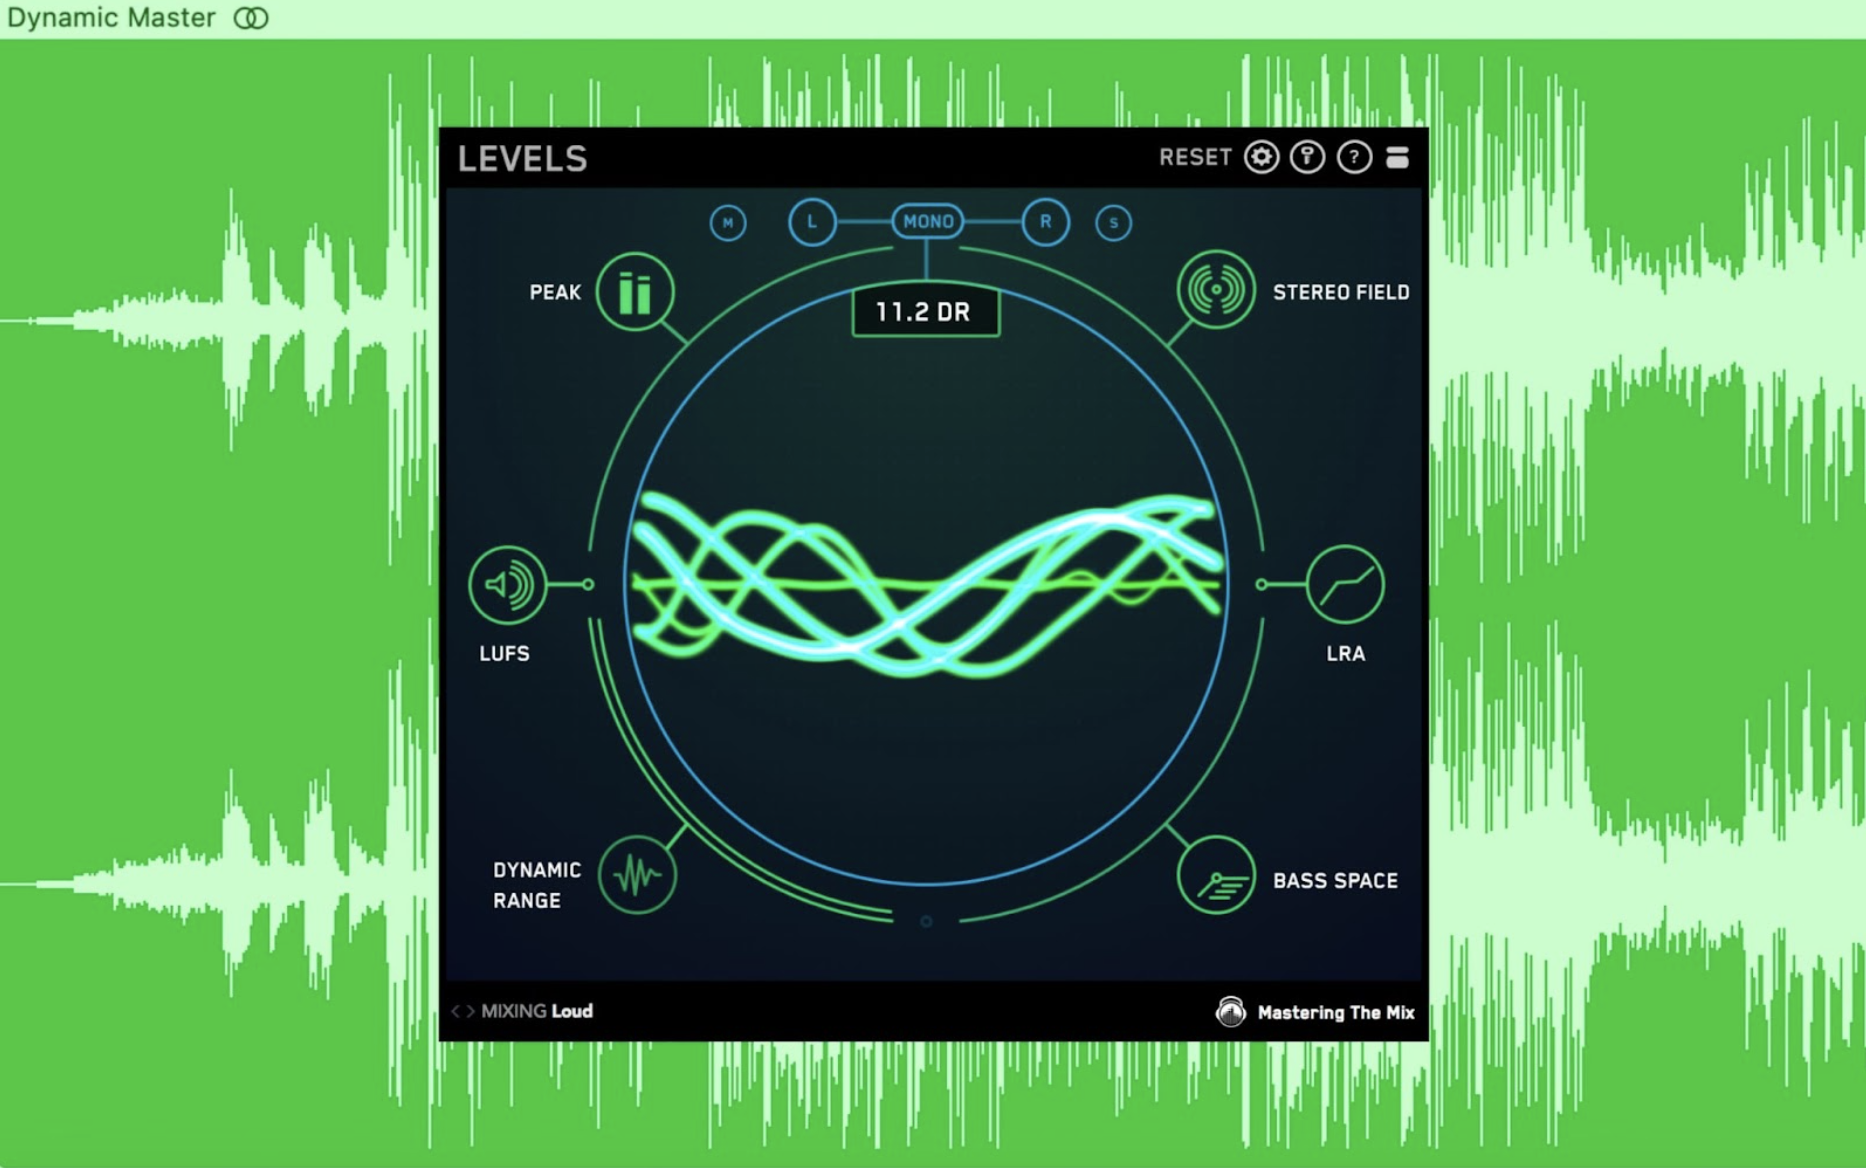
LEVELS by Mastering The Mix (pictured above) analyzes the technical details of your mix and warns you if there is an issue that needs to be fixed. LEVELS glows green with no warnings if the master is dynamic.
The Basics of Dynamic Range: Understanding Loudness vs. Dynamics
Before we dive into the techniques for dynamic mastering, it's important to understand the basics of dynamic range.
In music production, dynamic range refers to the difference between the loudest and quietest parts of a track. Loudness refers to the overall volume of the track.
A track with a wide dynamic range has a lot of variation between the loud and quiet parts, whereas a track with a narrow dynamic range has very little variation. Loudness is not the same as dynamic range. A track can be very loud but have very little dynamic range if it's heavily compressed.
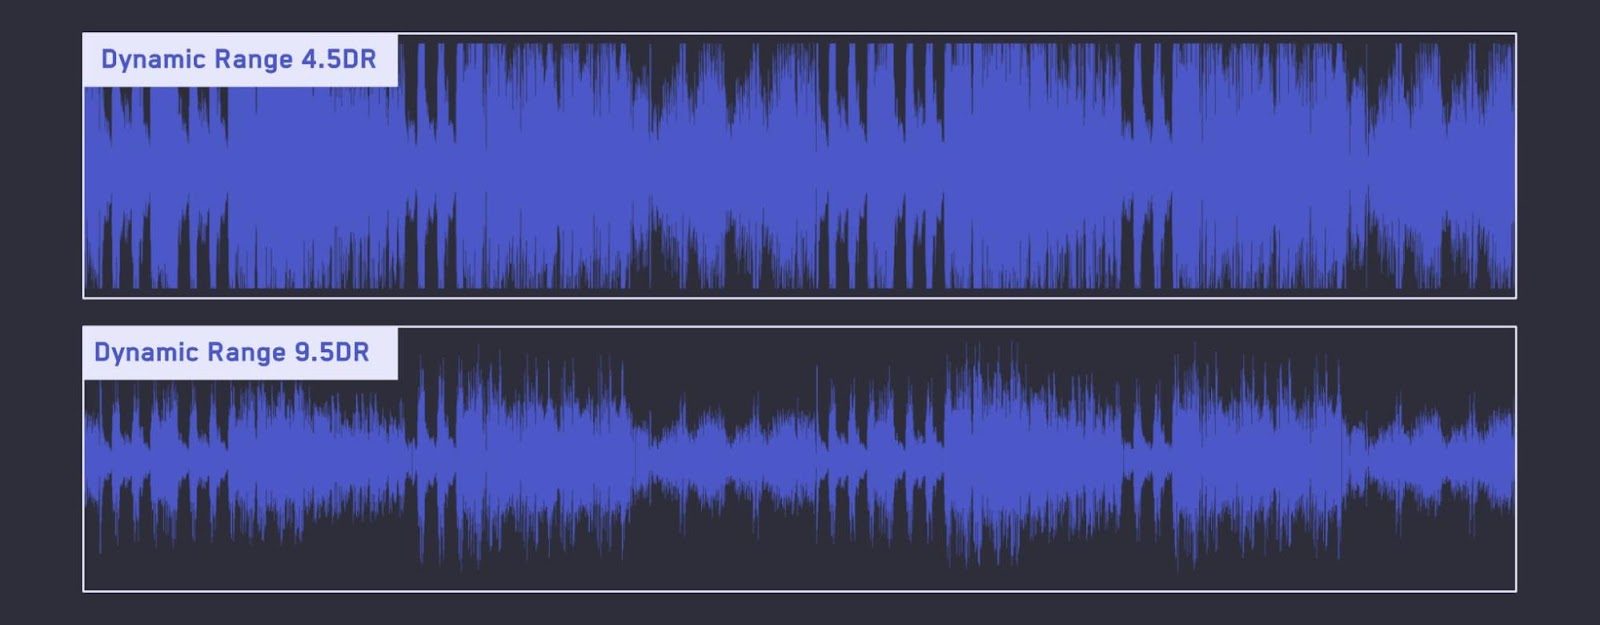
Try to think of dynamic range in two ways. The first is the short-term punch of the music measured as ‘Dynamic Range’ or DR. This is the individual transients, such as the drums or the attack of a synth. The lower the number, the less dynamic range your track has.
The second is the long-term dynamics or ‘Loudness Range,’ which gives you the statistical measure of loudness variation of your entire track.
This long-term reading will give you an idea of the difference in volume between the verse, chorus, and other sections of your track. Like the DR reading, the lower the number, the less loudness range your track has. Loudness Range is measured in LU (loudness Units)]
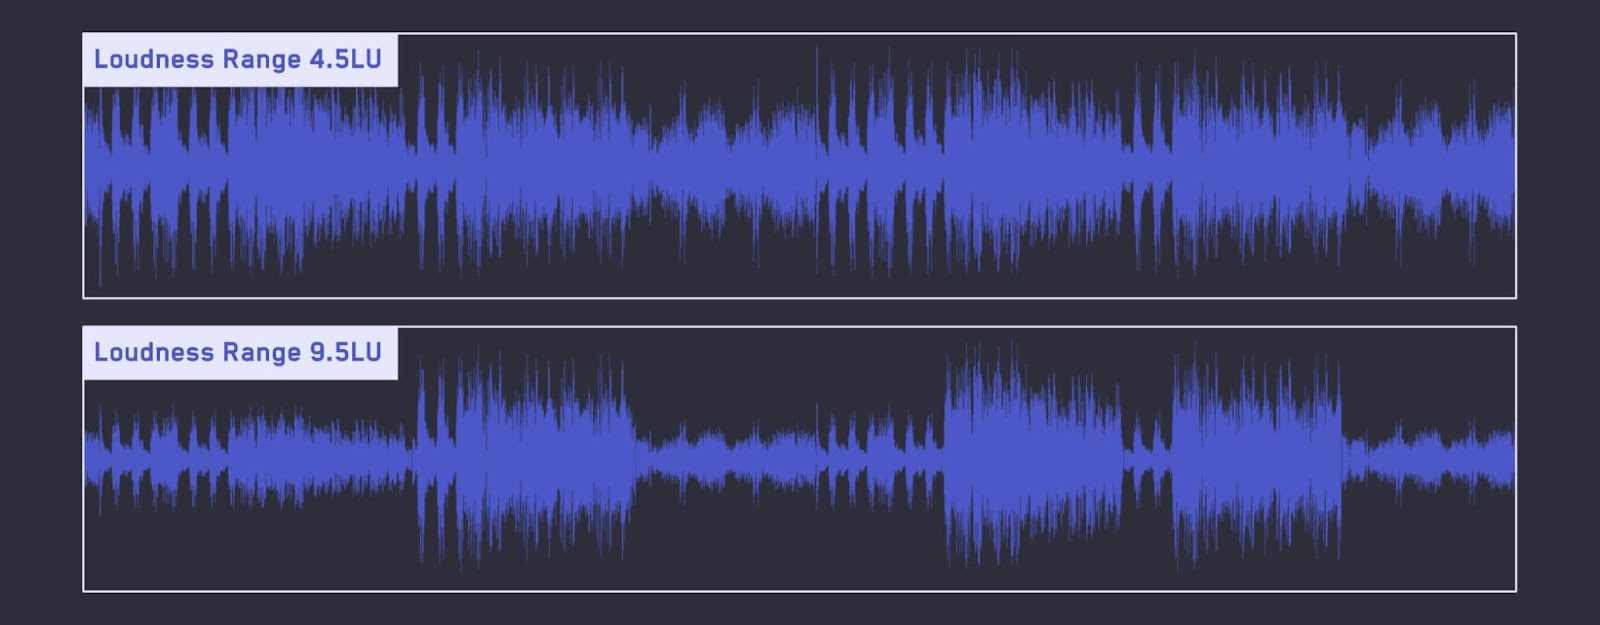
If the loudness of the various sections in your track are very similar or equal, the loudness range will be smaller.
Techniques for Dynamic Mastering: Compression, Limiting, and More
There are several techniques that you can use for dynamic mastering, including compression, limiting, and more.
Compression is a common technique used in dynamic mastering.
It works by reducing the dynamic range of a track, making the loud parts quieter and the quiet parts louder. This can help to even out the levels of a track and make it sound more polished.
This is where you need to be careful, as over-compression can lead to a loss of dynamics and a flat sound.
Try to only tickle the signal so you’re getting around 2-4dB of gain reduction. This can be done by setting the threshold just below the audio peak, and having a low ratio of around 1.5:1 (try to avoid going above 2:1).
Limiting works by setting a maximum level for a track, so that any parts that exceed this level are automatically reduced in volume. This can help to prevent clipping and distortion, but it can also lead to over-compression if used too aggressively.
Use a transparent-sounding limiter, and keep the attack above 500 ms for a more open-sounding master.
This will avoid the limiter clamping down on each transient in an obvious way. Limiters with an auto-release feature can also be more natural sounding and musical, as the release changes dynamically with the music.
LIMITER by Mastering The Mix is a smart mastering plugin that analyzes your audio and suggests the most appropriate gain, attack, release, link and ceiling settings for a transparent sounding master.
Pro tip: Parallel compression is a technique used to add more punch and presence to a track. It involves blending a heavily compressed signal with the original signal, creating a more dynamic sound without sacrificing the natural dynamics of the music.
Balancing Levels with Automation: Achieving a Natural and Dynamic Sound
Automation can be used in conjunction with compression and other mastering techniques to achieve a natural and dynamic sound.
By automating the volume levels of different parts of a track, you can ensure that each part of the music is given the attention it deserves.
This can help to create a more engaging listening experience for the listener and make the music more emotionally impactful.
To use automation effectively, it's important to have a clear understanding of the structure of your track and what parts of the music are most important.
You can then use automation to bring out the dynamics of each part of the music, creating a more engaging listening experience for the listener.
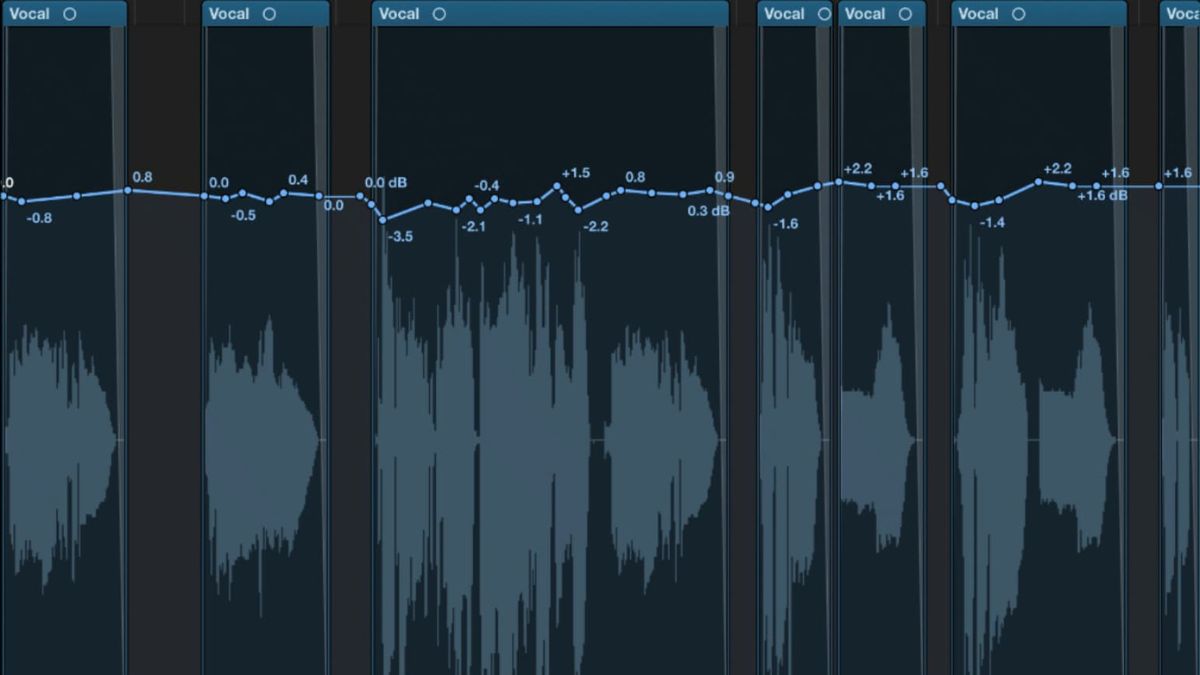
For example, you might use automation to bring up the volume of a vocal during the chorus or to bring down the volume of a guitar solo during a verse.
If your recorded audio is super dynamic, your compressor will have to work extra hard to keep the loudness steady. This gives the sound a very obvious ‘pumping’ sound.
To avoid this, use automation to balance out the volume imperfections BEFORE your compressor. It’s a time-intensive process, but the benefits it brings to your music is so worth it. You’ll get a much more natural and open sound, whilst controlling the overall volume.
The Importance of Monitoring: How to Ensure a Balanced and Dynamic Mix
One of the most important aspects of dynamic mastering is monitoring.
Without proper monitoring, it's impossible to ensure that your track is balanced and dynamic. Monitoring involves listening to your track through a variety of different speakers and headphones to ensure that it sounds good on all types of audio systems.
When monitoring your track, it's important to listen for any parts of the music that are too loud or too quiet.
You should also listen for any parts of the music that are lacking in dynamics or emotional impact.
By listening carefully to your track through a variety of different audio systems, you can ensure that your track is balanced and dynamic and that it will sound good on any type of audio system.
In addition to monitoring your track, it's also important to use reference tracks to ensure that your track is up to par with other professionally produced tracks.
By listening to reference tracks, you can get a sense of how your track stacks up against other songs in terms of loudness, dynamics, and overall sound quality.
This can help you to make any necessary adjustments to your track to ensure that it sounds great and is ready for release.
Knowing how to master your music whilst retaining the dynamic qualities is an essential technique for music producers.
By understanding the basics of dynamic range and using techniques such as compression, limiting, and automation, you can ensure that your tracks are polished and engaging.
However, it's important to use these techniques with care and to monitor your tracks carefully to ensure that they are balanced and dynamic. By listening carefully and using reference tracks, you can ensure that your tracks sound great on all types of playback systems and are ready for release to the world.
With these techniques in your toolkit, you can take your music production skills to the next level and create tracks that truly stand out from the crowd.


Comments:
Oct 17, 2023
Oct 22, 2023
Nov 02, 2023
Login to comment on this post