How to Mix Music? A Beginners Guide to Audio Mixing
Audio mixing is a process that is little-known outside of the music industry. Even music superfans, who will often know the names of the producers of their favorite records, will seldom know who mixed them. So just what does this process involve? Is it something you can do yourself? Where do you start? We answer all of these questions below.
What is Audio Mixing?
A technical definition of audio mixing is; a process in which multi-track material (recorded, synthesized or sampled) is treated, balanced and combined into a multichannel format (normally two-channel stereo). But this only provides us with part of the picture. Yes, an important part of mixing is the combining of various musical parts into a balanced and cohesive whole – but we shouldn’t forget that mixing is still part of a creative and artistic process. A mix engineer has to be able to listen to the music they are working on with a sympathetic ear – which parts should be foregrounded, which should be in the background? Should the vocalist sound like they are singing in a church or whispering in your ear?
Technical decisions made during the mixing process can change the emotional content of a piece of music. In his book, ‘Mixing Audio’, Roey Itzhaki describes mixing as “a sonic presentation of emotions, creative ideas, and performance.”
The technical aspects of mixing are important too of course, and part of a mix engineer’s job is to make sure that the musical material is presented in its best possible light. It’s possible that musical instruments have been recorded down with a whole host of problems; unpleasant resonances, buzzes or clicks, inconsistent dynamics – the list goes on and on. During the mixing process, we are often able to rectify such problems, with the aim of providing the audience with a more pleasant listening experience.
There is also an important technical component when it comes to the balancing of all the instruments in the mix. A mix engineer has to ensure that everything is audible and that the mix is well balanced both across the stereo field and across the frequency spectrum – we will explain these concepts in detail below.
What is the Difference Between Mixing and Mastering?
As mixing and mastering are both ‘post-production’ processes (they commence after the recording has finished), they are sometimes confused with one another. Mixing happens at the start of post-production and involves the processes we’ve already discussed; musical elements are balanced, treated, and combined. The mixing process may also involve a certain amount of audio editing. A mix engineer deals with a multitrack session in which it is normally possible to separate out individual instruments so that they can each be treated independently.
Once the track is mixed, it is normally bounced down to a single stereo audio file (although it is possible to bounce down to a file that contains more channels, such as a 5.1 surround mix). This file is then passed along to the mastering engineer. This is the final part of the process and involves the engineer listening to the mixed track and making EQ and compression adjustments with the aim of making sure the track sounds as good as it can across the widest possible range of different playback devices.
Mastering also ensures that the track is at an appropriate level for broadcast. If a project contains more than one song – an album for example – a mastering engineer will ensure that there is a consistent listening experience from one song to the next. They do this by ensuring not just that the tracks are at the same level, but also by making sure that the EQ profiles of each track are broadly similar.
Should You Learn How to Mix Your Own Music?
The short answer is yes! There are a huge number of reasons to learn how to mix your own music. If you have to pay someone else to do your mixes for you, that is going to be quite a large outlay over the course of a career – money that you could be spending on improving your own studio setup. Even if you have a decent-sized budget for your release and you’d like someone else to mix it, it can be useful to send a mix engineer a rough mix that is in the ballpark of how you want it to sound – that way they are more likely to really deliver something you love. This brings us to probably the most important reason for learning this skill set yourself; nobody understands your creative vision as you do! If you have the skills to mix your own music, you will have the ability to realize your creative vision yourself, and that’s a powerful asset.
What Do You Need to Get Started?
You don’t need a huge amount of equipment to start learning how to mix, and you certainly don’t need a high-end studio or racks of expensive equipment. However, there are some important technical aspects of this process that you’ll need to consider if you’re going to achieve decent results on a budget.
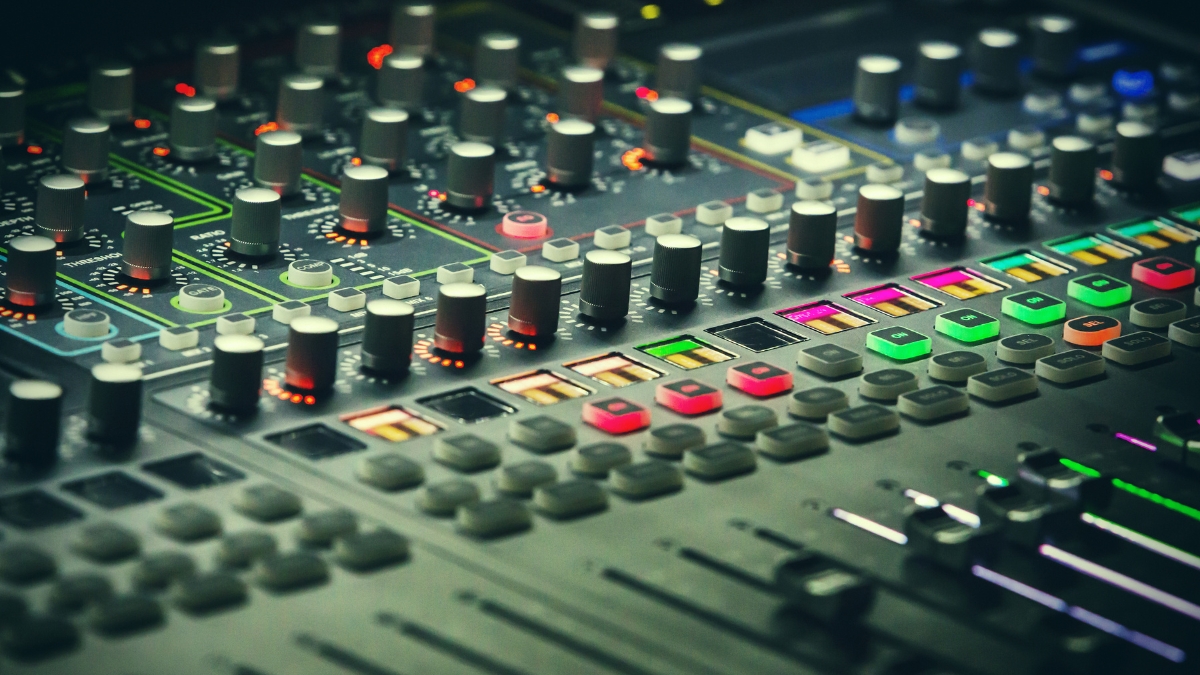
If you’re already making music, then the good news is that you probably already have most of what you need for mixing. You’ll need a computer that is running a Digital Audio Workstation (DAW) as this software will enable you to organize multi-track material and add effects processors. You can mix on any DAW you like, but some common choices at a range of different price points include Logic, Pro Tools, Ableton Live, FL Studio, and Cubase.
In addition, you’ll want to ensure that you’re hearing the material that you are mixing as accurately as possible so you should invest in some studio monitor speakers and some high-quality studio monitor headphones. It’s important that you mix on equipment that was designed for the job. Hifi speakers and consumer headphones are not transparent – they deliberately color the audio with EQ curves in order to make it sound more appealing to consumers.
This means that you are not getting an accurate picture of what your music sounds like when you use this type of equipment. An example of this is that many popular brands of consumer headphones boost the bass of the music they playback quite significantly. If you mix your music on these headphones and then play it back on another system you may find that it sounds quite flimsy – you thought the bass was hitting hard when in fact the headphones were doing a lot of the work.
Studio monitors and headphones are designed to be as transparent as possible – and the more expensive the equipment, the more transparent intends to be. It’s therefore worth investing in the best equipment you can – but don’t worry if that isn’t a great deal, to begin with as there are various ways to mitigate problems caused by lower quality equipment. Great headphones tend to be a lot cheaper than great monitors, so early on in your mixing career, it is worth prioritizing a really good pair. It’s important to listen on monitors too however as there are problems that can surface in mixes that were crafted purely on headphones; such as the stereo image being too narrow.
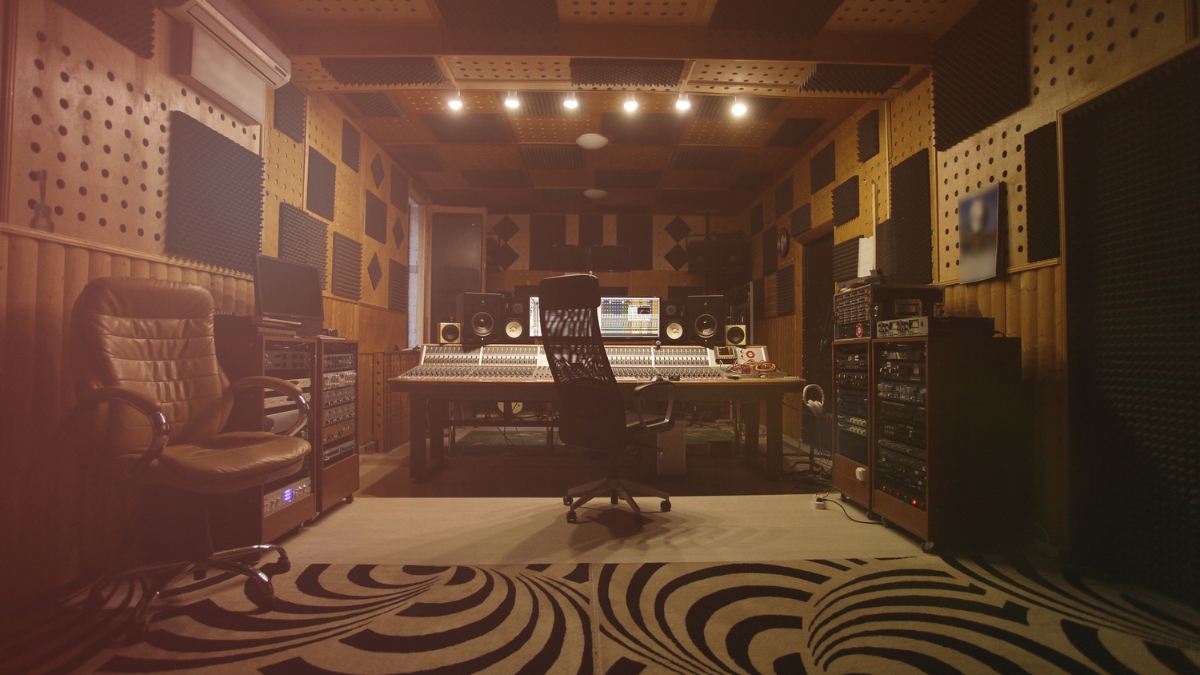
A key aspect of mixing that is often overlooked by novice mix engineers is the quality of the room in which the mixing takes place. There is a reason that pro studios invest tens of thousands of dollars on the acoustics of their control rooms – this stuff makes a difference. If you are mixing in a room that wasn’t designed for the purpose it is likely that it will color the sound quite dramatically – certain frequencies will sound less prominent than they are and vice versa.
This means that you are mixing without knowing how your mix will translate to other systems in other rooms. Of course, most people starting out don’t get to make a choice about where they mix their music – it has to be in their bedroom, their basement, or wherever there is space for a desk and a laptop. Thankfully, even in these less-than-perfect spaces, there are things we can do to mitigate listening in a sub-par environment. Remember those great quality headphones we advised you to buy? They take the room out of the equation and will give you a more transparent representation of your mix. In addition, Adapting a daily habit of audio ear training allows you to effectively learn how your room sounds both were studio monitors and headphones.
The Basic Audio Processing Workflow
Good organization is extremely important when mixing. A structured workflow will save you a great deal of time, and can even leave you with a better sounding mix. Below we break down a typical mixing workflow, step by step. This isn’t the only way to approach mixing - and you may want to tweak things in order to develop a process that works well for you – but if you follow the steps we outline here, you won’t go too far wrong.
Perhaps understandably, people tend to do little preparation when mixing their own music. They feel that they know the music inside out, and therefore have a clear idea of what they are trying to achieve. This is a mistake. Prior to the start of the mix is a great time to take a step back from the music in order to try and listen to it objectively.
Reference Tracks
Listening to reference tracks is a hugely important part of laying the groundwork for a great mix. Listening in this context means really listening – in a lot of detail! Choose a track that’s in the same genre as your music and that has a brilliant mix.
A fantastic hip-hop mix will sound different from a fantastic folk-rock mix so it’s important to choose something that is relevant to the music you are making. Whichever genre your reference track is in, it should have excellent tonal balance and clarity, allowing you to hear each individual element clearly. It should have a great soundstage too, which means you are looking for a nice balance of musical elements across the stereo field. It should also be sympathetic to the music on a creative level – this is harder to pin down but it’s important that the mix brings the best out of the music and really helps it deliver its message.
Once you’ve chosen a suitable reference, you should analyze it in granular detail. How loud is each musical element? Where is it panned? How is each element EQ’d? What effects can you hear? Keep referring back to it as your own mix progresses to make sure that you are staying on track. It’s important of course to listen to your reference track through the same speakers and headphones that you are using for mixing, in order to be able to make direct comparisons between the two tracks.
Calibrate Your Ears
It’s important to calibrate your ears before you begin mixing. Itzhaki writes that “the ability to craft a good mix is based on repeated evaluations.” One question you will ask yourself over and over again throughout the mixing process is “what’s wrong with what I’m hearing?” If you are able to correctly evaluate the mix then you can figure out what’s wrong with it and start to make corrections – and for this, your ears need to be calibrated.
Is the mix too muddy? Then there must be a problem with the equalization of the bottom end. If your ears are calibrated, you should quickly be able to home in on the problem frequency and correct it. Is there too much compression on the vocal? Or not enough? Are the guitars lacking in power? Is the synth too harsh? Again and again, you will need to identify and then correct a problem.
SoundGym is designed precisely to help you with problems like these. Through regular ear training, you will soon be able to precisely pinpoint problematic frequencies, detect changes in compression levels, accurately locate sounds in the stereo field, and much, much more. There is no shortcut when it comes to training your ears – you’ll need to put the work in – but SoundGym will help you get there more quickly with targeted training while ensuring that things stay fun!
Listen to the Rough Mix and Organise the Session
Before you start mixing, it’s worth asking yourself one simple question – ‘is this song ready to mix’? Is there anything missing? Are the recordings good enough or do you need to re-record in order to get a better sound or better performances? You want to avoid ‘fixing it in the mix wherever you can; if you are dealing with high-quality recordings and great performances, the mix should be much easier to get right.
When you are sure that you’re ready to mix, it’s really worth putting some time into preparing your session. While it’s understandable that you may want to dive in and get to work, a certain amount of mix prep can help you to work much more efficiently. First, try and use standard track layouts in every mix you do; a common layout would be drums first, then percussion, followed by bass, guitars, synths and vocals.
It doesn’t matter if you don’t follow this template exactly, but if you lay things out the same way every time, you will find your sessions much faster to navigate; when you need to fix the guitars, you’ll know exactly where they are! You should also consider color-coding your tracks (drums yellow, guitars red, vocals pink, etc.) – this is another quick thing to do that will help you navigate your session, particularly if you have a high track count.
Finally, mark out your song structure on the DAW’s timeline. That way it will be easy for you to jump between sections of the track with a click of the mouse.
Equalization
Equalization (or EQing) is arguably the most important part of mixing and is also one of the hardest elements to get right. It is therefore a key area for you to should focus on, and spend time perfecting. You are probably already familiar with the idea of equalization – home stereos have EQ functions that allow you to do things like boosting the bass. Essentially, EQs are tools that allow us to boost and cut levels at specific frequencies.
You can apply EQs to individual tracks in your mix so that they fit together better with the other elements in the mix – think of it as a kind of jigsaw puzzle. If too many elements in your mix are prominent in the same frequency bands your mix will sound unbalanced – too many low frequencies and it will sound muddy, too many high frequencies and it will sound harsh. The aim of EQing is to balance all of the individual elements so that the final mix contains a nice mix of frequencies right along the spectrum from the low-range to the upper-range.
Equalization 1: Low-Range
The low range (under 250Hz) of a mix is the hardest part to get right on a home studio setup. This is because of the limitations of hearing this part of the frequency spectrum accurately without expensive equipment and a great room for listening in. Following the advice that we’ve already offered; if your monitoring situation isn’t perfect, then try mixing the low-range on a pair of good headphones. It can also help to use a frequency analysis tool such as Voxengo’s SPAN – which is available for free. This will give you a visual representation of the frequencies that are being produced in your mix.
When mixing the bottom end pay particular attention to the way the kick drum and bass interact, and watch out for masking. Masking occurs when two instruments are prominent in the same range of frequencies – and it causes each of those instruments to lose definition in the mix. EQing can help to reduce masking; use a frequency analyzer to find out which frequencies are most prominent in your kick drum. If your kick is packing a punch at 100Hz, then consider cutting your bass in this frequency range.
If the low end of your mix is lacking in definition, it can be good practice to use a high-pass filter on some (or all) of your higher frequency instruments. This filter is a type of EQ that only allows sound through if it is above a certain frequency (set by you). This means we can cut low frequencies on guitars, synths and vocals that aren’t adding much substance to our mix – but are cluttering up the bottom end and making our kick and bass less defined. Be careful when you do this that you don’t go too far as that can lead to your instruments sounding thin and lacking in body.
Equalization 2: Mid-Range
The mid-range of a mix (250Hz-4kHz) is often the busiest section, and can become a real balancing act as a result! The problem mix engineers often face is that guitars, vocals, and synths are frequently prominent in exactly the same band of frequencies, and they therefore get in the way of each other. The task, therefore, is to carve out a portion of the mix for each instrument, ensuring that each can be heard clearly.
The first step towards getting the mid-range right actually happens during production rather than during the mix. For example, if your lead guitar and vocal are playing in the same octave and at the same time, they will really get in the way of each other. Try arranging the song so that the guitar plays in the gaps in between the vocals – or move the guitar up an octave so that it occupies a slightly different frequency range.
Assuming that you are happy with the arrangement, it’s now time to fit all of these different elements together. One important thing to note at this point is that you can change the character of an instrument by cutting or boosting frequencies. This can be detrimental as if you cut the wrong frequencies your instrument may lose character. However, it can also be extremely positive as if you boost an instrument in the area in which it sounds most interesting you can actually add character to your mix. Try to balance the individual needs of each instrument with the needs of the overall mix – this isn’t easy so take your time with it!
Equalization 3: Upper-Range
The upper range (above 4kHz) is important for adding clarity, definition, and sparkle to a mix. Other than synthesized tones, cymbals, and hi-hats you may often find that there is not so much naturally going on at the top end of your mix and you may need to tease these frequencies out in order to give your mix a nice full sound. It can be a nice trick to boost the top end of a vocal to add some ‘air’ to it; try boosting it a little at around 5kHz.
You can add more air to the mix generally with a high shelf (somewhere above 10kHz) that can boost elements such as cymbals and reverbs. Be aware that some instruments can be quite noisy in the upper range and this can also cause unwanted clutter – for instance, lead guitars can often be cut above 10kHz without adversely affecting their sound, and this will reduce aspects of the recording such as hum and crackle.
Compression
Dynamic range compression (normally just called compression) reduces the dynamic range of an audio source – meaning that the difference between the loudest and quietest parts of the performance is decreased. Compression is hugely important for smoothing performances out. Imagine a bass guitar part that has been played at inconsistent levels by a musician. This will make for an unsatisfying listening experience as instead of a consistent sounding bass line that drives the song along it will appear too quiet in some places and too loud in others – completely unbalancing the rhythm section.
This is where compression can help. A compressor brings down the level of the loudest notes in performance, making it sound more consistent. As the performance will now be quieter than its initial volume, the compressor also allows us to then boost the entire signal to a level that is appropriate to our mix.
If you apply compression to several individual tracks across a mix (and it is very common to use it on drums, bass, guitars and vocals) then it becomes easier to set a level for each instrument that will work throughout the entire song.
Spatial Effects (Panning, Reverb, and Delay)
When mixing to stereo, we can imagine that we are positioning mix elements in a 3D soundstage (see illustration below). Instruments are placed vertically depending on their frequency profile – low-frequency instruments at the bottom and high-frequency instruments at the top. We already mentioned that in a good mix you will have a nice balanced spread of instruments along this vertical axis. We can also spread out instruments from left to right (lateral placement) using panning, and we can place them from front to back using volume, reverb, and delays.
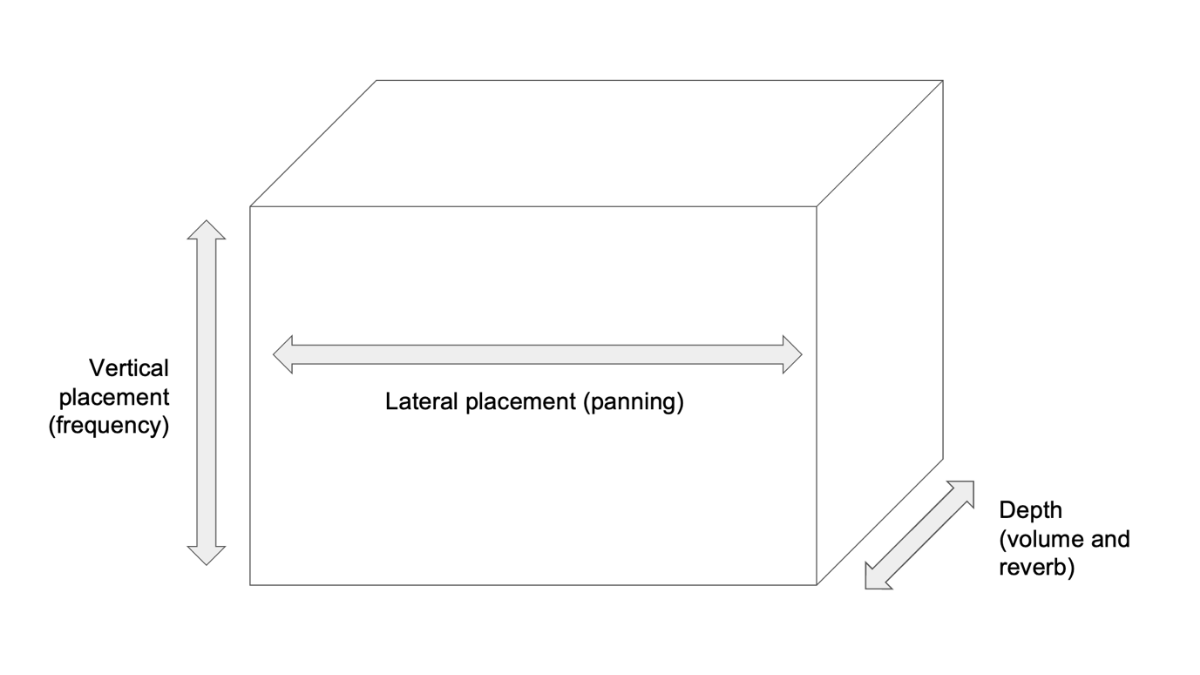
A good mix will fill this soundstage from left to right and front to back, as well as from bottom to top. Panning allows us to easily give the impression of moving mix elements between the left and right speakers by lowering the volume in one speaker. As the volume drops in the right speaker, the sound will appear to move to the left – and vice versa. It’s important to keep the mix balanced across the horizontal plane; generally low frequency instruments (kick drum and bass) are placed in the center of the mix, along with the vocals. Other elements can be panned out wider, with one element generally being balanced by another; if your rhythm guitar is panned to the left then perhaps your lead guitar can be panned to the right.
Lowering the volume of an instrument will move it back in the mix, but so will adding reverb. Elements without reverb can feel close to the listener, while elements drenched in reverb sound further away. This gives us another tool with which to separate elements from one another in the mix. Delays also add depth but can also provide rhythmic interest and width.
Spatial effects are not only used for technical mix enhancements, however; they can drastically change or enhance the creative direction of the music. A vocal with very little reverb can sound direct and immediate, whereas one which is swimming in reverb can sound dreamy and ethereal. Certain styles of effects can also reference entire genres; a ‘Space Echo’ style delay calls dub reggae to mind, whereas a spring reverb can remind a listener of 50s rock’n’roll.
Distortion and Saturation
Distortion and saturation are different versions of the same sort of effect. Saturation is a light distortion that can add warmth and texture to mix elements – some DAWs even allow you to saturate every track across a mix at the touch of a button. Saturation plugins are often designed to emulate old hardware and can therefore add a retro feel to your mixes.
Distortion is more extreme; you can use this effect to add grit and power to individual mix elements. As with the other effects we have discussed it can also be used as a creative tool; use it on a vocal in a garage rock track, or on a synth bass in a dubstep track.
Automation
None of the processes we’ve described so far need to be static in your mix – things can change over time as required by the track. Automation allows you to do this – you can draw changes into the timeline of your DAW that can alter volume levels, panning, or individual effect controls over time.
Finish the Mix
When you’re getting close to being finished, it’s time to test the mix out in different scenarios. Check it again against your reference track – are you accurately replicating the features of the reference that make it great? Listen to the mix on different speaker systems – in your living room, in your car, on your laptop. Does it sound good wherever you listen to it? If not, can you make adjustments that help it to translate better across different systems?
Once you’re happy, your work is ready to be mastered and released into the world! Then it’s time for you to finish the next song, and the next – with care and attention you will improve from mix to mix, learning more each time you return to your DAW.

Comments:
Login to comment on this post