What Does MIDI Stand For in Music? Discover the Most Powerful Tool in Music Production
MIDI technology is so fundamental to digital music creation, and so integrated into today’s DAWs that if you make music on a computer you’ve almost certainly used MIDI at some point already. Despite this, it can be difficult to untangle exactly what it is and what it stands for in Music.
In this article, we’re going to dig into what MIDI is, where it came from, how it works, and – most importantly of all – how you can use it effectively in your own productions.
What is MIDI?
MIDI stands for Musical Instrument Digital Interface. It is a communication standard, or protocol, that allows digital music equipment to communicate.
The key function of MIDI is, therefore, that it allows pieces of equipment such as your synthesizer and drum machine to talk to your computer – but it can also do much more than that, and we will go into plenty of detail on its capabilities further into this article.
An important factor to remember is that MIDI does not represent audio information – MIDI data is different from the data that is stored in audio files. Instead, it represents information about performance, the pitch of the notes that have been played, their duration, their volume, and so on.
Who invented MIDI?
MIDI is really the brainchild of two people - Dave Smith, founder of Sequential Circuits, and Ikutaru Kakehashi, founder of Roland – although others manufacturers were also involved.
In 1981 compatibility between items of music hardware made by different manufacturers was a real problem; there was no way for them to communicate with each other. Smith and Kakehashi could see that the music tech landscape was shifting towards digital and was worried that this lack of compatibility would restrict people’s use of synthesizers – and that ultimately this would mean lower sales.
A need for a ‘universal’ communication standard was therefore identified, and MIDI was the result.
In late 1982, MIDI was announced to the public and appeared on two new pieces of hardware; the Sequential Prophet-600 and Roland's JP6. At the January 1983 NAMM show, these two devices were successfully connected to one another at a public demonstration and a new era of music-making was ushered in.
How does MIDI work?
MIDI devices transmit performance data via MIDI messages, which are composed of 8-bit numbers (or bytes). MIDI messages carry two important pieces of information – they can specify the type of message being sent (is the message about pitch, or velocity for example), as well as specifying the data value itself (what pitch should the note be? How hard is the velocity?).
Message bytes can carry a range of values from 0-127.
This means that MIDI volume starts at 0 – silent – and goes up to a maximum of 127.
When it comes to pitch, there are 128 different note values, typically this starts from the C five octaves below middle C and extends more than 10 octaves. Some other key parameters that can be controlled by MIDI include:
- Note on and off. When a note is pressed and when it is released.
- Aftertouch. The pressure that is applied to a key after the initial depression.
- Control Change. The changing of a parameter value on a device.
- Program Change. Changing a patch number on your hardware.
- Pitch Bend. The speed and distance that a pitch bend wheel is moved.
In addition, some important system messages can be carried by midi. For example, the timing clock allows for synchronization between devices – this means that an arpeggio can be synchronised to your project BPM for example.
The transport can also be controlled by MIDI, telling a device such as a drum machine when to start and when to stop.
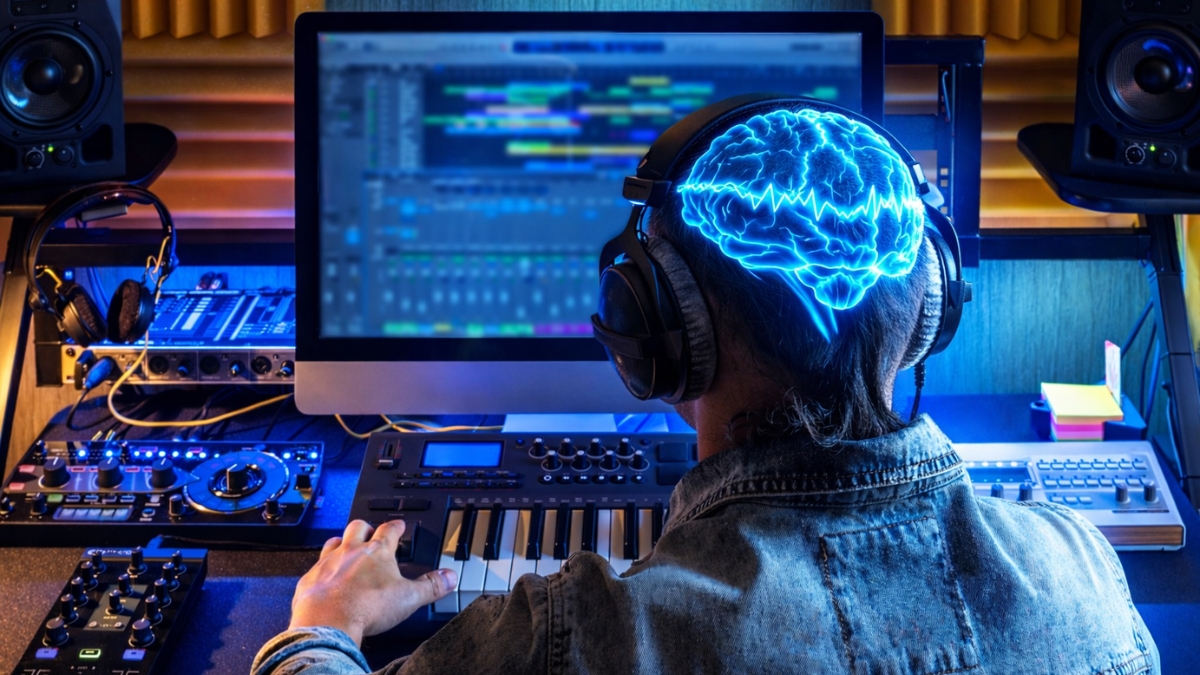
MIDI Keyboards
Behind an audio interface and a set of monitors, a MIDI keyboard is probably the most common piece of equipment that we see connected to a computer as part of a music production setup.
A MIDI keyboard allows us to play musical parts, which are recorded into a DAW as performance information.
This way we can quickly input chord patterns or melodies as MIDI data, which can then be edited at our leisure. This data can then be used to control software instruments and samplers or external hardware instruments – as long as they are MIDI-compatible.
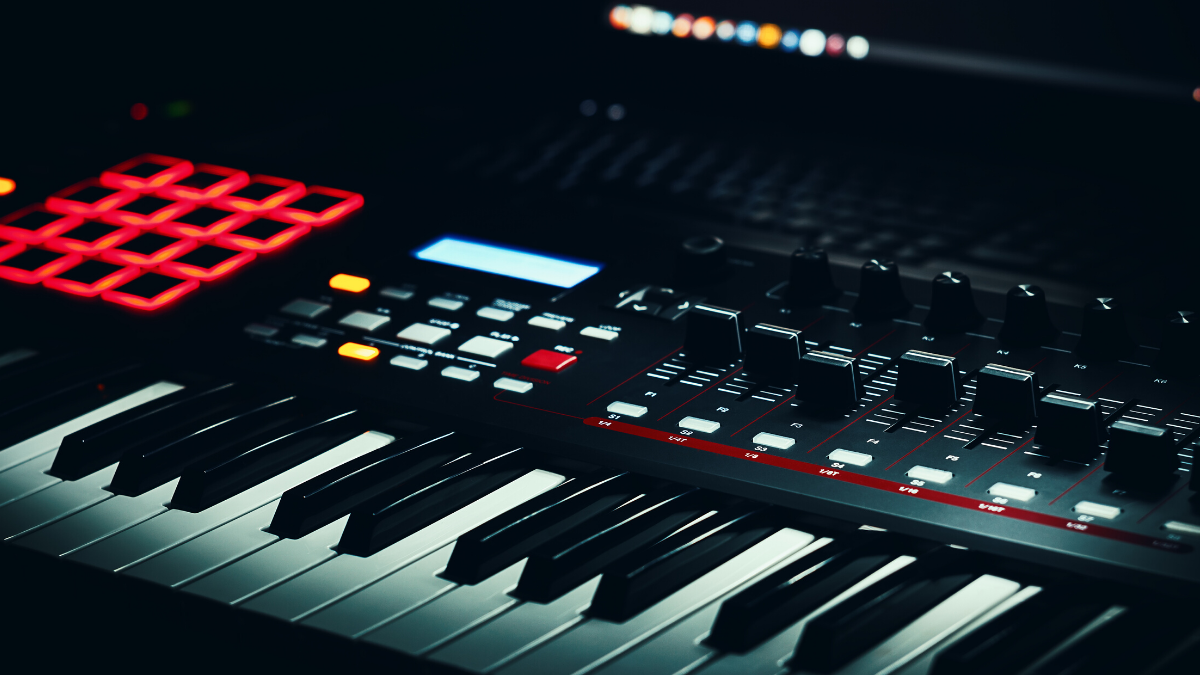
Other MIDI Controllers
There are plenty of pieces of hardware out there that send MIDI messages, but that does not include a keyboard as part of their design. The most well-known are probably the Ableton Push and the Novation Launchpad.
However, there are far simpler controllers out there too – for example, Monogram makes one that is literally only three sliders.
Controllers can sometimes be used to play melodies but they are often used for other functions such as launching samples, or changing parameters in real-time; a filter cut-off on a synth or the mix level on a delay plugin for example.
Many MIDI keyboards offer some of this extra functionality too – often they come with sliders and knobs built in that can be assigned to different functions in your DAW. More on this later on!
MIDI Ports
MIDI ports are built to be connected to other MIDI ports using a 5-pin MIDI cable. A MIDI-compatible piece of hardware will generally feature at least two ports; MIDI In and MIDI Out. The ‘In’ is for receiving information, while the ‘Out’ is for sending it.
To explain how you would use a MIDI In and a MIDI Out, let’s consider an example in which we have a synthesizer with a keyboard connected to a DAW on our computer. The synth uses its MIDI In to receive information from the DAW; perhaps we have programmed a chord pattern, and we want to ‘play’ this pattern on our synthesiser so that we can record the results down as audio.
MIDI can do this for us. We can use the MIDI Out on the synth to send information to the computer. That means we can use it as a MIDI controller to operate software synths in the DAW. In this imagined setup, the MIDI In on the computer is connected to the MIDI Out on the synth, and vice versa.
On some devices, you may also find a MIDI Thru port. Short for MIDI Through, this passes an exact copy of the information that is coming into the device via the MIDI In. This means you can daisy-chain devices together so that they can all be controlled by the same master, allowing you to build more complex hardware systems.
The first computer to include MIDI ports as standard was the Atari ST in 1985, and this machine quickly gained a foothold in the music industry as a result. These days no computers come with MIDI ports as standard, so you might need a MIDI to USB converter in order to connect your hardware.
However, many modern MIDI keyboards are actually perfectly capable of transmitting information via a USB output, so you may not need a MIDI cable at all.
MIDI Cables
The 5-pin MIDI cable was introduced by Smith and Kakehashi in large part because it was so cheap to implement in digital hardware.
The amount of information it can transmit was actually considered slightly limited even in 1983, but the idea was that it was so cheap to add this tech to your hardware that you’d be crazy not to. And it worked! MIDI quickly became a standard and we are still using it nearly 40 years later.
More recently some work has been done to improve the standard – and we discuss this below in the section on MIDI 2.0.
A MIDI cable can carry up to 16 separate channels of MIDI information. This means that a single cable path can actually be used to control multiple instruments – or you can control up to 16 different values on the same instrument simultaneously. This is called multi-timbral operation.
How to use MIDI in your music
Now that we’ve explained the basic principles of MIDI operation, let’s dig into the details of how you can use it as part of your music production workflow.
MIDI in Your DAW
You can record, import, and edit MIDI in your DAW quickly and easily. Every software platform does this differently, and it’s worth spending the time figuring out how it all works in your DAW of choice; if you become proficient with MIDI it will open lots of doors for you when it comes to music creation.
If you can already play a musical instrument then figuring out melodies and chord patterns will probably not be too difficult for you, but don’t worry if you are not an instrumentalist as there are tools out there to help you.
ToneGym's progression generator is a free tool that allows you to build and play chord progressions. The online generator will play chord progression according to voice-leading principles. In very little time you will create musical-sounding chord sequences that you can then play or program into your DAW.
MIDI Channels
We’ve already covered the fact that a MIDI cable can carry data for 16 separate channels, but within your DAW you will have access to many more than this.
In fact, in most DAWs you can run a literally unlimited number of MIDI channels simultaneously, although if each of these channels is linked to a different software instrument you might find yourself running out of CPU power before the number gets too high!
MIDI channels are most important when you are running hardware connected to your computer as you can dedicate different channels to different pieces of hardware.
This means that your drum machine won’t try to play your chord pattern and your synth won’t try to play your drum beat! However, DAWs are capable of quite complex internal routing of MIDI channels too, and this can sometimes be useful. For example, Native Instruments Kontakt is a sampler that can contain multiple software instruments.
Within one Kontakt plugin, you could therefore house an entire string quartet – two violins, a viola and a cello. Each of these instruments will be playing different musical parts, so in this instance you could set up four different MIDI channels, each containing a different part, and send these all to the same Kontakt sampler.
Automation
You can automate all of the different MIDI parameters right there in your DAW as you would expect.
One additional technique that you might consider adding to your workflow is using your MIDI controller to automate certain parameters in your session. The dials and faders that are found on MIDI controllers are excellent for automating plugin parameters, track volumes and much more.
Automating using a controller, instead of drawing straight lines into your automation lanes with a mouse, can add a little musicality to the process.
A technique that is often recommended by film music composers is to automate the volumes of orchestral elements by hand like this.
Try gradually fading up the level of your string parts using a fader – you may be surprised by how much more realistic they sound. If you’d like a little more detail on this process, check out our blog on working with orchestral samples.
MIDI sequencers
A MIDI sequencer is a hardware unit, or a computer programme, that puts together a musical sequence by stringing together a series of MIDI events. Does that sound like something you can do in your DAW? Well, that’s because a sequencer forms a central part of pretty much every DAW out there.
Every DAW is different, but for most of them, this sequencer takes the form of a piano roll of some kind.
A piano roll is a grid with a piano keyboard on the left-hand side. The vertical axis of the grid represents the pitch of the notes on the piano roll, while the horizontal axis represents time.
Once you’ve recorded MIDI into your DAW, you will be able to view and edit it on the piano roll, and if you don’t have a MIDI keyboard you can draw notes directly on to the piano roll in order to create MIDI data.
Within the piano roll view, you should be able to add and delete notes, move them around, shorten or lengthen them, change their velocity, copy and paste them and much, much more. If you work in electronic music then this functionality will be central to your workflow, but it can be useful to master MIDI programming no matter what genre you work in.
You may use MIDI to program drums and synths for your indie band, or to add a string section to your folk song.
If you work with samples extensively then consider triggering those samples with a MIDI sequencer – it opens up some interesting and creative options, and we’ve explored some of these in a blog if you’d like some inspiration. Even if your track is going to eventually be made up completely of live recordings, MIDI can still be extremely helpful in the demoing process.
You can use MIDI to quickly sketch out an arrangement which may be useful as part of your own creative process, while you can also easily share the MIDI with collaborators. You can even export the MIDI parts as sheet music notation in some DAWS – meaning that you can print it out and give it to session musicians to play for you.
MIDI Quantise
Quantization is an extremely useful function that you will find embedded in every DAW.
This process allows you to move your MIDI notes onto a grid of your choosing – which means you can adjust performance to make it more in time at the touch of a button. This is useful if you recorded a musical part into your DAW using a MIDI keyboard but you are not happy with the tightness of your performance.
If you move the notes so that they are 100% in time, it can lead to the part sound quite mechanical – in some genres this can be desirable, but in others, you may want to retain some more humanity in the performance.
In those cases, consider using a function in your DAW that lets you move the notes a percentage of the way towards the grid – but not all the way onto it.
MIDI 2.0
In many ways, it is surprising that MIDI has been at version 1.0 since the early 80s!
The protocol was developed for early 80s hardware so it couldn’t be demanding of processor power and it had to be cheap – as the key to it becoming an industry standard was that it was affordable for manufacturers to implement.
However, as we’ve already mentioned, even in the early 80s, certain voices in the industry were concerned that MIDI 1.0 was slightly too limited; 40 years later we are working with much faster equipment and updating the MIDI protocol has become a priority.
At the time of writing, we are still waiting for MIDI 2.0 to officially launch, but in 2020 the spec was agreed and manufacturers are already releasing hardware that will be 2.0 compatible.
The new standard will be fully backward compatible with MIDI 1.0 gear but will take a number of large steps forward – offering up some extremely interesting possibilities.
MIDI 1.0 sent one-way messages; from a transmitter to a receiver. With MIDI 2.0, devices can engage in dialogue; essentially meaning that they can communicate with one another in a way that allows for auto-configuration of hardware and software.
The resolution has also been greatly improved – we are moving from the 128 steps of MIDI 1.0 to 32-bit resolution, which promises that controllers will have a smooth ‘analogue’ feel. Timing has also been improved, and new options have been added for articulation control and precise note pitch.
Another interesting development is the idea of ‘property exchange’ – devices can share detailed, specific information about themselves to other devices. This means that one MIDI 2.0 device can provide another with everything that it needs to know in order to function as effectively as possible. An example of how this could work is that your DAW could automatically display all the information related to your hardware synth onscreen. The idea here is that hardware synths are brought up to the same level of recallability as software synths.
By now you hopefully have a good grasp of what MIDI is, how it works, and how you can use it in your music production process.
As always though, there is more to learn! You can explore advanced MIDI functions such as Groove quantise, or MIDI transform. You can consider how to rebuild drum loops using a sampler and MIDI. You can get deep into using expression data and velocity changes to create a realistic orchestral sound.
The main thing, however, is to become comfortable with the basics of MIDI in your DAW of choice and to think carefully about how you might use it to improve your own individual workflow.
Comment on this post on SoundGym Community